Frozen Beefy Queso Burrito
1. Introduction
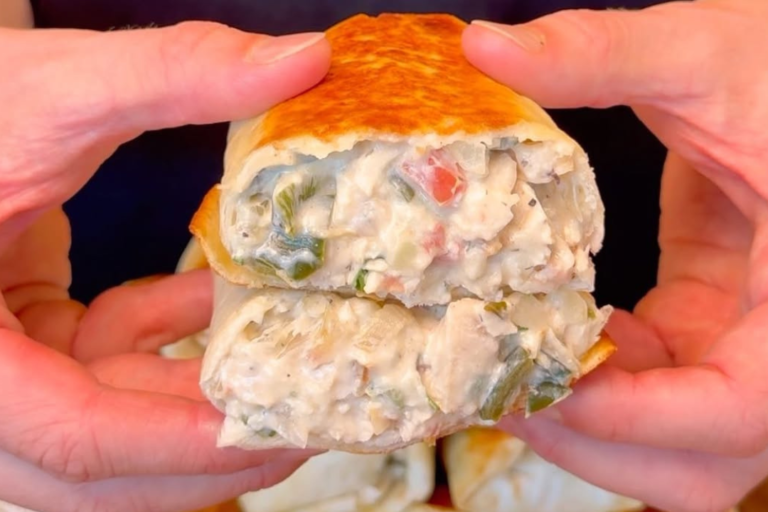
When it comes to comfort food, few dishes are as satisfying and convenient as a Frozen Beefy Queso Burrito. This recipe is perfect for anyone who’s craving a hearty, cheesy, and filling meal that’s quick to prepare and even easier to enjoy. Whether you’re meal prepping for the week or looking for a tasty snack, these burritos will have your back.
The Frozen Beefy Queso Burrito is a delicious twist on the classic burrito, combining ground beef, cheese, and a rich queso sauce all wrapped in a soft tortilla. What makes these burritos even better is the convenience—freeze them, and you’ve got a satisfying meal ready to go in minutes.
This recipe is special because it’s customizable, easy to make in large batches, and, of course, incredibly tasty. You can serve them for lunch, dinner, or even as a late-night snack, and they’ll always hit the spot.
2. Why You’ll Love This Recipe
Here are a few reasons why the Frozen Beefy Queso Burrito will quickly become a favorite:
- Convenience: Prep a batch of these burritos, freeze them, and you’ve got a delicious meal ready to heat up at any time. No more ordering takeout when you’re craving something tasty and filling.
- Hearty and Satisfying: With its combination of ground beef, rice, cheese, and creamy queso sauce, this burrito is packed with protein and flavor, making it perfect for a filling lunch or dinner.
- Customizable: You can easily adjust the ingredients to suit your preferences. Add extra veggies, swap out beef for chicken, or change the type of cheese. The options are endless!
- Freezer-Friendly: These burritos freeze well, making them perfect for meal prep. Simply heat them in the microwave or oven, and they’re as good as new.
- Kid-Friendly: If you’ve got picky eaters at home, this recipe is sure to be a hit. It’s cheesy, comforting, and full of familiar flavors that kids love.
3. Ingredients You’ll Need
To make Frozen Beefy Queso Burritos, you’ll need the following ingredients. I’ve also included some suggestions for substitutions in case you want to tweak the recipe to suit your taste.
For the Beef Filling:
- 1 lb ground beef (You can substitute with ground turkey, chicken, or plant-based ground meat for a leaner or vegetarian version)
- 1 small onion, diced
- 1 clove garlic, minced
- 1 tbsp taco seasoning (or use homemade seasoning mix)
- 1/2 cup cooked rice (White or brown rice works; quinoa is a great gluten-free alternative)
- Salt and pepper, to taste
For the Queso Sauce:
- 8 oz Velveeta cheese, cubed (For a healthier option, use a reduced-fat version or a homemade queso using shredded cheese and milk)
- 1/2 cup milk (You can use dairy or non-dairy milk, depending on your preference)
- 1/2 cup salsa (Use your favorite salsa—mild, medium, or spicy depending on how much heat you like)
For the Burrito Wrap:
- 4 large flour tortillas (You can use whole wheat or low-carb tortillas for a healthier option)
Optional Garnishes:
- Chopped cilantro
- Sour cream or Greek yogurt
- Sliced jalapeños (for extra heat)
4. Preparation (Step-by-Step Instructions with Details)
Now let’s break down the preparation of your Frozen Beefy Queso Burritos. Follow these easy steps for a quick and delicious meal.
Step 1: Prepare the Beef Filling
- Cook the Ground Beef: In a large skillet, heat 1 tablespoon of oil over medium-high heat. Add the ground beef and cook until browned, breaking it apart with a spoon as it cooks.
- Add the Onion and Garlic: Once the beef is browned, add the diced onion and minced garlic. Stir and cook for 2-3 minutes until the onions are soft and translucent.
- Season the Beef: Add the taco seasoning and stir well to coat the beef mixture. Season with salt and pepper to taste. Cook for an additional 2-3 minutes, allowing the flavors to meld together.
- Add Rice: Stir in the cooked rice and mix everything together until fully combined. Remove from heat and set aside.
Step 2: Make the Queso Sauce
- Melt the Velveeta: In a separate small saucepan, add the cubed Velveeta cheese and milk. Heat over medium-low heat, stirring occasionally, until the cheese melts and becomes smooth.
- Add Salsa: Once the cheese has melted, add the salsa to the mixture and stir to combine. Continue cooking for 2-3 minutes, allowing the flavors to blend together into a creamy, cheesy sauce.
- Adjust Consistency: If the queso is too thick, add a bit more milk until it reaches your desired consistency. If it’s too thin, let it cook for a few extra minutes to thicken up.
Step 3: Assemble the Burritos
- Prepare the Tortillas: Lay the flour tortillas on a clean surface. If you prefer a softer tortilla, you can warm them up for a few seconds in the microwave or on a hot skillet.
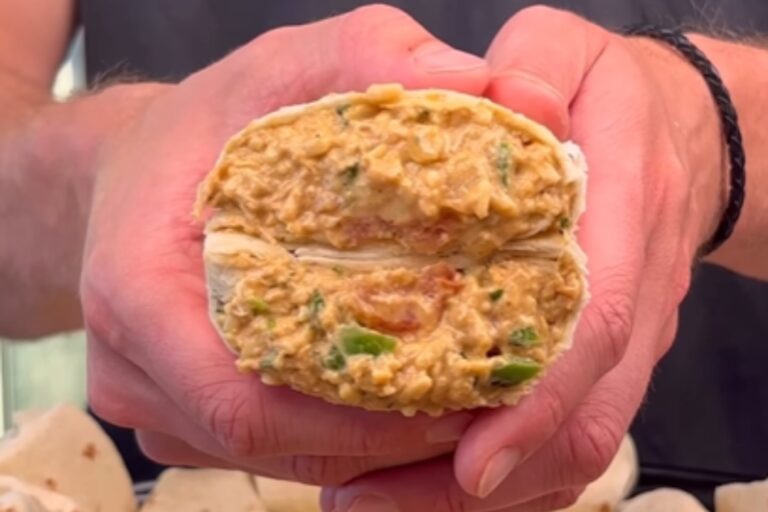
- Layer the Beef Mixture: Spoon a generous amount of the beef and rice mixture onto the center of each tortilla.
- Add the Queso Sauce: Drizzle a few spoonfuls of the creamy queso sauce over the beef and rice mixture.
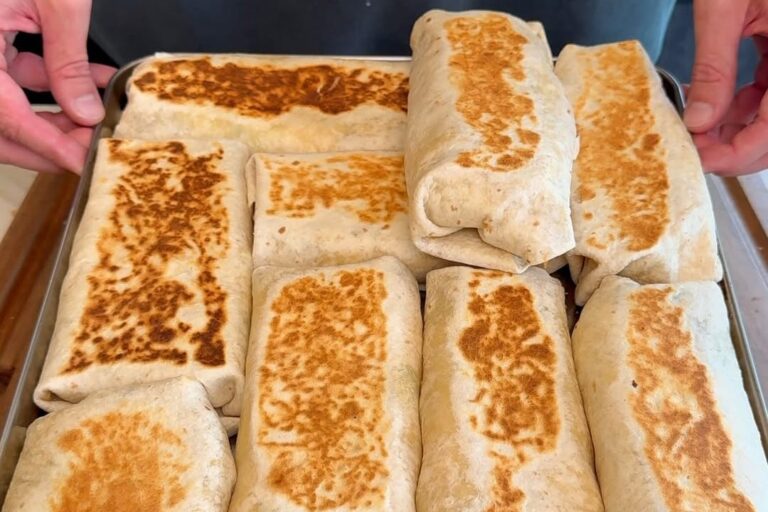
- Roll the Burritos: Fold in the sides of the tortilla and then roll it up from the bottom, ensuring all the fillings are securely wrapped inside.
Step 4: Freeze the Burritos
- Wrap and Freeze: Wrap each burrito tightly in plastic wrap or aluminum foil. Place them in a freezer-safe container or zip-top freezer bag for storage.
- Freeze: Store the burritos in the freezer for up to 3 months. They will remain fresh and ready to heat up whenever you need a quick meal.
5. Variations & Substitutions
The Frozen Beefy Queso Burrito is highly customizable. Here are some variations and substitutions to make it your own:
- Swap the Beef: You can substitute the ground beef with ground turkey, ground chicken, or even plant-based ground meat for a vegetarian or leaner version of the burrito.
- Use a Different Cheese: If you don’t like Velveeta, you can make a homemade queso sauce by melting shredded cheddar or Monterey Jack with milk. For a healthier version, try using reduced-fat cheese or a combination of Greek yogurt and cheddar for a creamy texture.
- Add Extra Veggies: You can add chopped bell peppers, corn, black beans, or spinach to the beef mixture for added flavor and nutrition.
- Spicy Option: For extra heat, try adding jalapeños, hot sauce, or even a spicy salsa to the beef filling or queso sauce.
6. How to Serve Frozen Beefy Queso Burritos
These Frozen Beefy Queso Burritos are great on their own, but you can serve them with a variety of sides and garnishes to make your meal even more enjoyable.
1. Serve with a Side Salad
Pair your burrito with a simple side salad of mixed greens, diced tomatoes, and a tangy vinaigrette for a refreshing contrast to the rich and cheesy burrito.
2. Add Guacamole or Sour Cream
For a creamy touch, serve your burrito with a side of guacamole or a dollop of sour cream (or Greek yogurt for a healthier twist).
3. Pair with Chips and Salsa
If you’re craving something crunchy, serve your burritos with tortilla chips and a side of salsa. This adds texture and a fresh, zesty contrast to the richness of the burrito.
7. Recipe Tips
Here are some pro tips to make sure your Frozen Beefy Queso Burritos turn out perfect every time:
- Ensure the burritos are tightly wrapped to prevent any filling from leaking out during freezing or reheating.
- If you’re making a large batch, be sure to freeze the burritos in a single layer before stacking them in a container. This prevents them from sticking together.
- Reheat properly: To reheat a frozen burrito, unwrap it from the plastic or foil and microwave it for 2-3 minutes (depending on your microwave’s power). Alternatively, you can reheat it in the oven at 350°F for about 20 minutes.
- Customize your fillings: Feel free to add your favorite toppings or fillings, such as cilantro, avocado, or pickled onions.
8. Cooking Notes
Storage:
One of the most convenient aspects of the Frozen Beefy Queso Burrito is that it can be made ahead of time and stored in the freezer for up to 3 months. This makes it an ideal option for busy families, meal preppers, or anyone who likes having a quick, satisfying meal on hand. Freezing these burritos not only helps preserve their freshness but also locks in all the delicious flavors. When stored correctly, the burritos maintain their taste and texture for months, making it easy to prepare a bulk batch and enjoy them at your convenience.
For storage, you’ll want to ensure that the burritos are wrapped properly to prevent freezer burn. The best method is to wrap each burrito individually in plastic wrap or aluminum foil, ensuring there is no air trapped inside. You can also use a freezer-safe container or ziplock bag to store multiple burritos at once. When freezing, it’s helpful to label the packaging with the date so you can easily keep track of how long they’ve been stored. This way, you’ll always know when they’re at their best.
When you’re ready to enjoy a burrito, simply remove it from the freezer and reheat it. If you’re using the microwave, place the burrito on a microwave-safe plate and heat it for about 2-3 minutes, or until the burrito is piping hot. If you prefer a crispier texture, you can oven-bake the burrito by wrapping it in foil and heating it at 350°F (175°C) for 20-25 minutes. This method will give you a nice crispy exterior while ensuring the inside is warmed evenly.
Serving Size:
This recipe yields 4 large burritos, which are perfect for meal prepping or serving a family of four. Each burrito is packed with a balanced mix of protein, carbohydrates, and fats, making it a filling and satisfying meal. Depending on your family’s appetite or meal preferences, you may find that these burritos are a perfect portion for a single serving. However, if you have a larger family or plan to use these burritos for meal prep, you can easily double the recipe to create more servings.
These large-sized burritos are also ideal for meal prepping for the week. You can prepare a batch over the weekend and have ready-to-eat meals for the entire week, saving you time on busy workdays and ensuring you always have a nutritious meal available. The balance of protein, carbs, and fat in each burrito will keep you full and satisfied, making it an excellent option for lunch, dinner, or even a hearty snack.
9. Nutritional Information (Approximate per Serving)
Here’s the approximate nutritional breakdown for one Frozen Beefy Queso Burrito:
- Calories: 450
- Protein: 28g
- Carbs: 40g
- Fat: 22g
This nutritional profile reflects a well-balanced meal that provides a hearty serving of protein and carbohydrates, making it a fulfilling choice for a main dish. With 28g of protein, it’s a great option for those looking to increase their protein intake. Protein is essential for muscle growth and repair, and it helps keep you feeling fuller for longer.
The 40g of carbohydrates provide a substantial amount of energy, making this burrito an excellent choice for anyone in need of a boost during the day. The carbs come from sources like tortillas, beans, and rice, which offer fiber and other nutrients that support overall health.
With 22g of fat, this burrito also offers a decent amount of healthy fats, which are essential for various bodily functions, including hormone regulation and the absorption of fat-soluble vitamins. The fat comes from sources like cheese, ground beef, and avocado, which also provide additional flavor and texture.
This recipe strikes a good balance between protein, carbs, and fat. However, if you’re aiming to make the burritos leaner or lower in carbs, there are easy adjustments you can make. For instance, low-carb tortillas or ground turkey can be substituted for traditional tortillas or beef. If you prefer a vegetarian option, swapping in plant-based proteins like tofu or tempeh can offer a lighter, lower-fat alternative while still maintaining a satisfying texture and taste.
10. Recipe Details
- Prep Time: 20 minutes
- Cook Time: 15 minutes
- Total Time: 35 minutes
- Yield: 4 servings
The Frozen Beefy Queso Burrito is a quick and simple recipe that can be made in under 35 minutes, making it an ideal choice for a busy weeknight or weekend meal. The prep time of 20 minutes allows you to chop, cook, and prepare the filling ingredients, while the cook time of 15 minutes focuses on heating the tortillas and assembling the burritos before wrapping them up and getting them ready to store or serve.
This recipe is efficient in terms of time and yields 4 servings, making it perfect for small families or individuals who want to prepare multiple meals at once. It’s a great way to feed a group without a lot of extra work, and the burritos are hearty enough to satisfy a variety of tastes and preferences.
11. FAQs
- Can I make the burritos ahead of time?
Yes, these burritos are perfect for meal prepping. You can prepare them in advance, freeze them, and have them ready to go when you need them. Whether you’re making them ahead for a busy week or just want a convenient meal, these burritos are an excellent solution. Simply prepare the filling, assemble the burritos, wrap them tightly, and freeze. When you’re ready to eat, you can either bake them directly from frozen or microwave them for a quick meal. - Can I freeze the burritos before cooking?
Yes, you can freeze the burritos either before or after cooking. If you choose to freeze them raw, make sure to wrap each one tightly in plastic wrap or foil. When you’re ready to eat, simply cook them directly from frozen. You can bake them in the oven or microwave them, depending on your preference for texture. - How can I make the burritos spicier?
For those who enjoy a bit more heat, there are several ways to spice up your burrito. You can add jalapeños to the beef mixture or stir some hot sauce into the queso sauce to amp up the spice level. If you prefer more heat in the filling, consider adding a pinch of cayenne pepper or a drizzle of sriracha to the beef as it cooks. The beauty of this recipe is that it’s highly customizable to your taste preferences!
12. Conclusion
The Frozen Beefy Queso Burrito is the epitome of convenience, flavor, and versatility. Whether you’re meal prepping for the week, looking for a quick weeknight dinner, or simply craving something cheesy and satisfying, these burritos are the perfect solution. Packed with protein, carbs, and a rich, melty queso sauce, they offer a well-rounded meal that will leave you full and content.
What’s great about this recipe is that it’s easy to customize according to your preferences or dietary needs. Whether you’re looking for a leaner option, need it to be gluten-free, or prefer a different protein source, the Frozen Beefy Queso Burrito can be tailored to suit your lifestyle. By making a batch and freezing them for later, you ensure that you always have a delicious and filling meal on hand.
With a simple set of ingredients and easy steps, you can enjoy a comforting and hearty burrito anytime you like—whether it’s freshly made or pulled straight from the freezer.